Difference between revisions of "Refutation of metal analysis deconstructions by IIG"
(→Part 1 – First Attempt: Further readability improvements, grammar improvements) |
Daniel Leech (talk | contribs) |
||
| (4 intermediate revisions by one other user not shown) | |||
| Line 1: | Line 1: | ||
| − | + | [[Category:Articles_by_others]] | |
= <span style="color:#000000;">Few words</span> = | = <span style="color:#000000;">Few words</span> = | ||
| Line 259: | Line 259: | ||
''Wollaston prisms are a type of prism made of two layers of a crystalline substance, such as quartz, which, due to the variation of refractive index depending on the polarisation of the light, splits the light according to its polarisation. The Nomarski prism causes the two rays to come to a focal point outside the body of the prism, and so allows greater flexibility when setting up the microscope, as the prism can be actively focused. “'' | ''Wollaston prisms are a type of prism made of two layers of a crystalline substance, such as quartz, which, due to the variation of refractive index depending on the polarisation of the light, splits the light according to its polarisation. The Nomarski prism causes the two rays to come to a focal point outside the body of the prism, and so allows greater flexibility when setting up the microscope, as the prism can be actively focused. “'' | ||
| − | A Wollaston prsm is used in a NIC setup<ref> | + | A Wollaston prsm is used in a Nomarski interference contrast (NIC) setup<ref>http://en.wikipedia.org/wiki/Wollaston_prism</ref>. |
Cross polarised light is a term used to describe the state of a polarising microscope when both the lower and upper polariser are inserted. Polarised light is light that vibrates only in one direction. The lower polariser causes the incident light on a section to vibrate usually in the E-W direction. The upper polariser only allows light vibrating in the N-S direction to pass. With no mineral specimen in the path of the light, no light will pass through the upper polariser, also known as the analyser. Optically anisotropic minerals in the path of the incident rays, however, split light into two rays that when recombined at the analyser can interfere and pass through. Thus optically anisotropic materials appear bright or relatively bright in the background of optically isotropic material. In other words, cross polarization is a technique for inspecting optically anisotropic materials (or birefringent material). | Cross polarised light is a term used to describe the state of a polarising microscope when both the lower and upper polariser are inserted. Polarised light is light that vibrates only in one direction. The lower polariser causes the incident light on a section to vibrate usually in the E-W direction. The upper polariser only allows light vibrating in the N-S direction to pass. With no mineral specimen in the path of the light, no light will pass through the upper polariser, also known as the analyser. Optically anisotropic minerals in the path of the incident rays, however, split light into two rays that when recombined at the analyser can interfere and pass through. Thus optically anisotropic materials appear bright or relatively bright in the background of optically isotropic material. In other words, cross polarization is a technique for inspecting optically anisotropic materials (or birefringent material). | ||
| − | [[http://microscopyu.com/tutorials/java/polarized/polarizerrotation/index.html | + | A tutorial found [[http://microscopyu.com/tutorials/java/polarized/polarizerrotation/index.html here]] explain the effect of rotation on a birefringent material (need to install Java to view): |
In the tutorial you will learn first hand how the intensity of polarized light, angle of incidence and focus are used simultaneously to observe behaviour of birefringent material under polarised light. | In the tutorial you will learn first hand how the intensity of polarized light, angle of incidence and focus are used simultaneously to observe behaviour of birefringent material under polarised light. | ||
| Line 277: | Line 277: | ||
<span style="color:#004586;">“</span><span style="color:#004586;">In Part 2 at the 3:21 time mark, Vogel interprets the bright region as evidence of metal birefringence. This is shown in Fig 9. To obtain these images, he either rotates one of the illumination polarizers or adjusts the Wollaston prism in an optical microscope equipped with Nomarski analysis setup.</span> | <span style="color:#004586;">“</span><span style="color:#004586;">In Part 2 at the 3:21 time mark, Vogel interprets the bright region as evidence of metal birefringence. This is shown in Fig 9. To obtain these images, he either rotates one of the illumination polarizers or adjusts the Wollaston prism in an optical microscope equipped with Nomarski analysis setup.</span> | ||
| − | Such rotation of polarizers and adjustment of Wollaston prism are integral to inspecting a birefringent sample. The effect of rotation of polariser is explained in above tutorial. Wollaston prism separates polarised light into two polarized outputs separated by an angle<ref>[https://www.thorlabs.com/newgrouppage9.cfm?objectgroup_id=917 https://www.thorlabs.com/newgrouppage9.cfm?objectgroup_id=917]</ref>. Wollaston prisms are commonly used in rotation mounts. A demonstration of use of Wollaston prism is available [[ | + | Such rotation of polarizers and adjustment of Wollaston prism are integral to inspecting a birefringent sample. The effect of rotation of polariser is explained in above tutorial. Wollaston prism separates polarised light into two polarized outputs separated by an angle<ref>[https://www.thorlabs.com/newgrouppage9.cfm?objectgroup_id=917 https://www.thorlabs.com/newgrouppage9.cfm?objectgroup_id=917]</ref>. Wollaston prisms are commonly used in rotation mounts. A demonstration of use of Wollaston prism is available [[https://www.olympus-lifescience.com/en/microscope-resource/primer/java/dic/wollastonwavefronts/]] (requires Java). |
| Line 284: | Line 284: | ||
The same link can be referred to verify how such a setup is used to illuminate a birefringent sample for examination. | The same link can be referred to verify how such a setup is used to illuminate a birefringent sample for examination. | ||
| − | At this mark, Vogel examines the silvery specimen at 4th stage, he rotates the analyzer (not the polarizer as Ivan asserts) while examining the specimen on the stage with fixed magnification. When the transmission axes of the analyzer and polarizer are crossed at an angle (90 degrees), maximum specimen birefringence is observed (maximum extinction of non-birefringent part). This is because no light from the non-birefringent part of the sample is accepted by the analyzer at this stage, however the region possessing birefringence couple some of the polarized light in one direction into other, therefore will not loose its brightness fully, but rather “appear” bright against the dark background. | + | At this mark, Vogel examines the silvery specimen at 4th stage, and he rotates the analyzer (not the polarizer as Ivan asserts) while examining the specimen on the stage with fixed magnification. When the transmission axes of the analyzer and polarizer are crossed at an angle (90 degrees), maximum specimen birefringence is observed (maximum extinction of non-birefringent part). This is because no light from the non-birefringent part of the sample is accepted by the analyzer at this stage, however the region possessing birefringence couple some of the polarized light in one direction into other, therefore will not loose its brightness fully, but rather “appear” bright against the dark background. |
Vogel also discovers birefringence at a higher magnification using SEM. Refer same video 6:35 mark. | Vogel also discovers birefringence at a higher magnification using SEM. Refer same video 6:35 mark. | ||
| Line 293: | Line 293: | ||
Ivan does not elaborate how above-mentioned effect would cause it. However, Fresnel effect is the observation that things get more reflective at grazing angles. An example would be that if you look straight down from above at a pool of water, you will not see very much reflected light on the surface of the pool, and can see down through the surface to the bottom of the pool. At a glancing angle (looking with your eye level with the water, from the edge of the water surface), you will see much more secularity and reflections on the water surface, and might not be able to see what's under the water. | Ivan does not elaborate how above-mentioned effect would cause it. However, Fresnel effect is the observation that things get more reflective at grazing angles. An example would be that if you look straight down from above at a pool of water, you will not see very much reflected light on the surface of the pool, and can see down through the surface to the bottom of the pool. At a glancing angle (looking with your eye level with the water, from the edge of the water surface), you will see much more secularity and reflections on the water surface, and might not be able to see what's under the water. | ||
| − | A simple yet beautiful demonstration is available in | + | A simple yet beautiful demonstration is available in youtube<ref>https://www.youtube.com/watch?v=F-2cUWUe0fY</ref>. |
Note here that the viewing angle changes and no polarized light is required to test this. | Note here that the viewing angle changes and no polarized light is required to test this. | ||
| Line 317: | Line 317: | ||
Now compare the above 2 figures, and note how it's not just edges that are illuminated. | Now compare the above 2 figures, and note how it's not just edges that are illuminated. | ||
| − | Ivan also omitted Dr. Vogel's analysis of other even more complex segments. He points out birefringence in all the sample he tested (gradually diffused from lower to higher stage material), and a couple | + | Ivan also omitted Dr. Vogel's analysis of other even more complex segments. He points out birefringence in all the sample he tested (gradually diffused from lower to higher stage material), and a couple are shown below: |
| − | <span style="background-color:transparent;">Looking at the first specimen from 4</span><span style="background-color:transparent;"><sup>th</sup></span><span style="background-color:transparent;"> stage, in tape 2 right in the beginning, Vogel points out birefringence. This specimen was polished: </span><span style="background-color:transparent;">“It is silvery as you can see in colour. It looks like it has been melted. This is the last specimen which was <muffled> in plastic, <muffled> and </span><span style="background-color:transparent;"> | + | <span style="background-color:transparent;">Looking at the first specimen from 4</span><span style="background-color:transparent;"><sup>th</sup></span><span style="background-color:transparent;"> stage, in tape 2 right in the beginning, Vogel points out birefringence. This specimen was polished: </span><span style="background-color:transparent;">“It is silvery as you can see in colour. It looks like it has been melted. This is the last specimen which was <muffled> in plastic, <muffled> and </span><span style="background-color:transparent;">polished in Switzerland and now you can see this meal in its pristine state”.</span> |
| − | <span style="background-color:transparent;"> | + | <span style="background-color:transparent;">Then in another instance, looking at the fifth specimen belonging to silvery 4</span><span style="background-color:transparent;"><sup>th</sup></span><span style="background-color:transparent;"> stage metal, Dr. Vogel comments “We are now looking at a silvery metal fifth specimen number 5 at the 4</span><span style="background-color:transparent;"><sup>th</sup></span><span style="background-color:transparent;"> stage of development, that is used according to the document that was given to me in the preparation of the spacecraft. We are looking at the object now which is being <muffled> and </span><span style="background-color:transparent;">polished, under cross field polarized light using a 250W Cesium Iodide light source”.</span> |
| − | Vogel then points out pockets of white birefringent sub-area in otherwise non-birefringent dark area (see below). Also note the difference between this area and the effect duplicated by Ivan by scratching one metal with another. This sample is remarked as being polished. | + | Vogel then points out pockets of white birefringent sub-area in otherwise non-birefringent dark area (see below). Also note the difference between this area, and the effect duplicated by Ivan by scratching one metal with another. This sample is remarked as being polished. |
[[File:IIG_Metal_Deconstruction_-_Reference_-_Diffused_birefringence.jpg|600px|thumbnail|center|Diffusion of birefringent areas in 5th specimen in otherwise non-birefringent specimen (non-illuminated majority). Poor video quality.]] | [[File:IIG_Metal_Deconstruction_-_Reference_-_Diffused_birefringence.jpg|600px|thumbnail|center|Diffusion of birefringent areas in 5th specimen in otherwise non-birefringent specimen (non-illuminated majority). Poor video quality.]] | ||
| Line 423: | Line 423: | ||
| − | <nowiki>**Thulium does not occur naturally in pure form, and was prohibitively costly in 70's. Recent discoveries have reduced the rarity of Thulium to about that of gold or Silver<ref>http://www.molycorp.com/resources/the-rare-earth-elements/thulium/</ref>, but in pure form remain hard to procure and relatively costly. | + | <nowiki>**</nowiki>Thulium does not occur naturally in pure form, and was prohibitively costly in the 70's. Recent discoveries have reduced the rarity of Thulium to about that of gold or Silver <ref>http://www.molycorp.com/resources/the-rare-earth-elements/thulium/</ref>, but in pure form remain hard to procure and relatively costly. |
| Line 553: | Line 553: | ||
| − | Again we see Ivan relying on nothing but instrument error to debunk presence of Rhenium, when in reality it is not possible to determine from the video | + | As postulated before, it is also possible that Vogel did not document 100% of his findings in Video. Also, Ivan mentions "if" Rhenium was though to be found, it could have been mistaken in place of "Zinc". Again, we see Ivan relying on nothing but instrument error to debunk presence of Rhenium, when in reality it is not possible to determine instrument error from the video. |
| − | + | Ivan time and again produced visually similar (not same) spectrum with crude manipulations and tried to associate the results of Vogel's analysis as instrument error or gross negligence or outright complicity. He used his go-to arguments to confuse the readers and debunk Thulium, Argon and Rhenium. He similarly used crude method to nearly simulate birefringence, as well as micro-manipulation. Then again, he completely ignored several other unusual properties exhibited by the sample. On the light of this, IIG and Ivan's debunking should not be taken seriously and further analysis should only be entertained from an unbiased metallurgist. | |
= Appendix A – Important terms and procedures = | = Appendix A – Important terms and procedures = | ||
Latest revision as of 09:11, 27 August 2018
Few words
Dr Vogel's analysis of metal samples given by Meier have been attempted to be de-constructed thrice by IIG.
The first attempted de-construction was published in IIG website and also reproduced in billymeierufocase.com[1]*. It is not known who authored the deconstruction, but it could very well be Ivan (who authored the second and third attempts). Ivan has a Phd in Electrical Engineering from University of California (UCLA). He is associated with HRL Laboratories, LLC (a contractor for DARPA). He is also an active member of IIG.
A second attempt at deconstruction was made on December 2011 by Ivan Alvarado-Rodriguez and also published in IIG website and reproduced in billymeierufocase.com[2]*. This was essentially an update of the first.
A lesser known, updated version of the second attempt, was published in Openminds.tv [3] in January 2012. This was again authored by Ivan Alvarado.
Henceforth these will be referred as “first attempt”, “second attempt” and “third attempt”.
The author strongly encourage the readers to read #Appendix A – Important terms and procedures before reading rest of the article, and to reference the original article during reading.
Part 1 – First Attempt
IIG mentions:“1. The 1983 book UFO…Contact From The Pleiades Volume II [1], the 1987 book Light Years: An Investigation Into The Extraterrestrial Experiences Of Eduard Meier [2], and the 2001 book And Yet…They Fly! [3] all state that research chemist Marcel Vogel used a scanning electron microscope to analyze the metal sample.
“We know that it is scientifically impossible to determine the composition of an object simply using a microscope regardless of the magnification.”
IIG based this conclusion from Guido's And Still They Fly where Guido joined two different analysis in same paragraph (pp 181) to convey that a small area under electron microscope enlarged 500 dia showed evidence of micro-machination and the same area contained rare-earth element Thulium. IIG thus assumed electron microscope photographs were used to detect micro-machination were used to detect Thulium. Detection of Thulium using electron microscope photographs was not found either in Light Years, Preliminary report or Supplementary report. It was mentioned, electron microscope was used. But it is of paramount importance that either electron microscope, scanning electron microscope or scanning transmission electron microscope can be and usually the source of electron for an Energy Dispersive X-Ray Spectroscopy (EDS or EDX) [4]. This type of x-ray production in the sample is the same principle as that of the generation of x-rays used in x-ray diffraction instruments. Detectors in EDS collect the characteristic x-rays that are generated from the sample to allow for compositional analysis of the material[5]. In fact, IIG failed to consider the videos of metal analysis where Marcel Vogel produced spectroscopic results to analyse the elemental composition and where he detected Thulium and other elements.
What Vogel actually did is there in tape for everyone to see. He pointed into the plain section of one sample and mentioned that he found evidence of what looks like mechanical manipulation. He mentioned that “We did and analysis of this area here, now at 500 diameter (showing the electron microscope image), the elements that we found (turns over to the spectroscopic analysis) were totally surprising. The major element which is shown here was the rare-earth metal Thulium (spells). It was totally unexpected with a very small trace down here Bromine. This minute dump down here was a combination of Argon and Silver. Now the remarkable thing we noticed was that yes we got this band here (points to where he detected Thulium), this was the only one that matched in the spectral analysis in the computer, but the secondary bands that are connected with it were not present, meant that it was a very pure metal, but the secondary emissions were not present.”
Vogel used two different techniques to find evidence of micro-machination (video or image from electron microscope), and elemental composition using energy dispersive spectroscopy with a scanning electron microscope (used as source). IIG implies that Electron microscope (photograph) was used in elemental analysis, which is an argument for distraction.
IIG mentions:“3. The 1987 and 2001 books both state that “one microscopic area revealed ‘an enormous mélange of almost all of the elements in the periodic table. Each pure element was bonded to each of the others, yet somehow retained its own identity.”
The author could locate this comment in the second edition of the 2001 book “And Yet They Fly”, i.e. Guido's “And Still They Fly”.
Vogel had analysed other areas of the same sample before and in the crystalline part, found Silicon, Iron, and Sulpher. The comment Vogel actually gave - “In this crystalline area, the predominant element was Silicon, and iron, and there was a secondary band of Sulpher, which is right here. These are very very intense bands and we did not attempted to analyse the other particular lines (gestures in between Silicon and Iron, and Iron and beyond) of the <muffled>, we just took the 3 main ones and list out there.”
Note that in the video Vogel never said that “all” the other lines are elements – just that he did not analyse them (for reasons unknown). One probable reason is that what looks like Bremsstrahlung radiation in a poor quality video, had some features that prompted Vogel to suspect other elements (not legible from the not-so-sharp video). Certainly auto-peak-detection (refer #Appendix A – Important terms and procedures) by the computer did not work, probably because of the unusually smooth fall off which was either due to low peak to background ratio, or due to the close spacing of peaks. The instrument could have interpreted any adjoining peaks as background and therefore had ignored probable elements. That Vogel suspected other elements in the region what appears now to be Bremsstrahlung continuum is a fact, but he did not further analyse this as evident from the video. Also this region, even if contained hidden peaks, Vogel would have found I extremely tough to meaningfully identify elements from this section. Hidden peaks or not, it is not possible to deduce from the data at hand, that in any way ‘an enormous mélange of almost all of the elements in the periodic table” can be inferred from the concerned section of the video of the spectral analysis. Why Guido's comment was linked to this part of spectral analysis by IIG, is unknown, as there is doubt that Guido's inference is based on analysis of another area of the sample, not on video. Vogel might not have recorded the concerned section at all as we will investigate now.
The author is of the opinion that this comment by Guido echoes the point made by Wendelle and the investigators in the Preliminary Report pp 426 as reproduced below. This paragraph reproduced below is the best match which could have been taken by Guido as source. Note that this paragraph is a part of a summary that lists the findings of the investigators, i.e findings from both metallic and non-metallic (crystalline) part, and this summary is again based on information provided in the preceding pages of the report.
However, on closer inspection, this statement is not related to the crystalline part of the sample, whose spectrograph shows what looks to be Silicon, Iron, Sulfur and what appears to be Bremsstrahlung continuum (in which Vogel might have suspected other elements), but some area of the metal part and here's why:
After describing that Thulium was found and that secondary bands for elements were missing (Preliminary report pp424) the Preliminary report states that non-electric cold fusion was suspected because of no ash or heat residue, and that pure Aluminium and Silver were also found (now into Preliminary report pp425), then the next paragraph mentions:
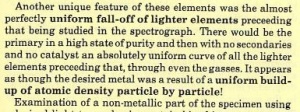
Immediately after the above paragraph (Figure "Describing the metallic part"), the report proceeds to explicitly mention that a non-metallic (i.e. crystalline) part of the sample is now being referred. The text of the report starting from "Examination of a non-metallic part of the specimen.." until the summary, has no mention of findings of any atomic build up or large number of elements, and that makes it clear that the source of the point 3 in the summary is from the the paragraph reproduced in the Figure "Describing the metallic part".
The author noted that the spectrograph which yielded Rhenium is not shown in video. Any x-ray diffraction analysis that might have been done by Vogel were also not made part of the interview video. It is highly likely that Vogel did not record 100% of his analysis in video, and that there were additional tests that Vogel carried out outside camera, and that could have given him additional insights.
IIG Mentions:“Even using magnification far greater than what Marcel Vogel used in his analysis it is still impossible to view the elemental, chemical, or atomic structure of an object using a scanning electron microscope.”
Guido, in his book combined two different analysis in same paragraph (And Still They Fly pp 181) to convey that a small area under electron microscope enlarged 500 diameter showed evidence of micro-machination and the same area contained rare-earth element Thulium. That Vogel used two different techniques, evidence of micro-machination was determined studying image from electron microscope, while elemental composition determination was determined using spectral analysis (with a scanning electron microscope as source), is for everybody to see on video.
IIG naively implies that Electron microscope (photograph) was used in elemental analysis, which is wrong. The fact is – Vogel did a micro-structure analysis (using SEM), then did a spectral analysis using energy dispersive spectroscopy to find the elements is there for everyone to see. Furthermore, the investigators intended to do perform x-ray diffraction analysis and Vogel was the right person, for this technique is ing widely used for x-ray crystallography. Though not on the interview video, it is likely that x-ray diffraction technique was also used to further analyse the structure and bonding.
From preliminary report - “We could see at this point that there are at least three more things we must do with these specimens. We should have an x-ray diffraction analysis and scanning electron microscope photographs to determine the structure of the alloy – how it is put together. We should also perform an energy dispersive x-ray examination and try to get a good quantitative analysis.”
IIG mentions:“As mentioned earlier, he was not a metallurgist. He was a chemist. As such, he was not qualified to perform a metallurgical analysis of Billy Meier’s metal sample. A chemist is defined as “a person versed in chemistry or given to chemical investigation.” A metallurgist is defined as a person versed in “the study of metals and their properties in bulk and at the atomic level.”
IIG fails to mention a chemist is an expert on the study of composition of matter and its properties and expert in doing so – precisely what he did with the metal samples. By virtue of his profession, he would have had extensive experience in SEM EDS technique. He had also become an expert in optical microscopy courtesy his work with crystals. In his own words - “For the past 20 years, since 1960, I have developed a skill in optical microscopy because I waned to study liquid crystal systems”. Plus, Vogel had 32 patents and an illustrious career in the line of luminescence, phosphor, magnetics and liquid crystals. To be an expert in the before mentioned areas, Vogel had to be an expert in most of the areas he applied during the sample testing.
By IIG's own logic, IIG's Ivan, who is a PhD in Electrical Engineering, would be discredited by just looking at the credential, being an Electrical Engineer and not a metallurgist.
IIG mentions:“It turns out that an actual metallurgist did analyse the metal sample and this is what was revealed:Page 214 of the 2001 book And Yet…They Fly! states the following:
Vogel never used microscope to determine composition. The photographs were used to determine the structure, and the spectograhs for elemental composition. Electron microscope is used for electron beam excitation in such an analysis set up. These are in Vogel's video for everyone to verify.
Part 2 – Second Attempt
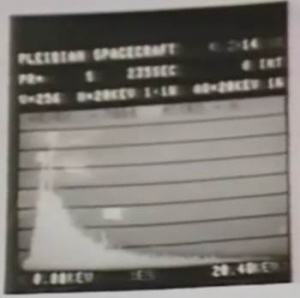
1. Material contains a wide range of elements of the periodic table. Vogel incorrectly interprets the continuum Bremsstrahlung X-ray spectrum as the spectrum produced by many element bands close together. The Bremsstrahlung spectrum contains no useful information about the element composition of a given sample.
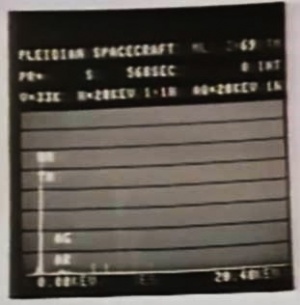
Ivan mentions:“The evidence presented here was a spectrum obtained using Energy-Dispersive X-Ray Spectroscopy. This spectrum is discussed in Part 3 of The Metal Analysis video at the 7:12 time mark. Figure 1 shows the spectrum taken by Vogel. “
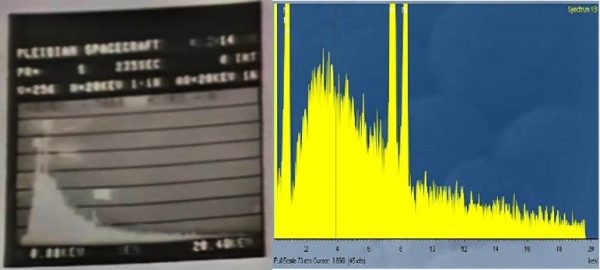
The picture which Ivan posted to de-construct...was the crystalline part that yielded Silicon, Iron and Sulfur. Here, Dr. Vogel mentioned Iron, Silicon and Sulfur. He did not present this as evidence of either “almost all elements of periodic table” or “wide range of trace elements”. Vogel indicated that he did not analyse other bands (hovering his pointer to the Bremsstrahlung zone). One probable reason is that Vogel wanted to avoid a discussion on Bremsstrahlung radiation with a non-expert and also it is possible that the section he pointed, what looks like Bremsstrahlung radiation, he suspected several overlapping peaks. Note also how the fall-off is very smooth, nearly missing any sharp spikes (with increasing energy, the emission intensity decreased smoothly, never going up to produce a peak). It would have been very difficult for Dr. Vogel to analyse this portion meaningfully as the distinction between what were genuine peaks and what were just Bremsstrahlung was blurred. Vogel suspected other elements in this region but did not analyse them. On what basis Ivan inferred that Vogel used this spectrograph to justify wide range of elements and the same was linked with Guido's remark is not known. Refer #Part 1 – First Attempt – First Attempt also.
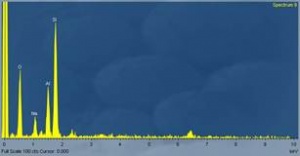
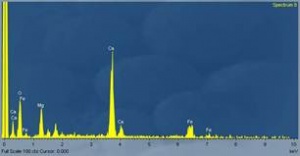
Ivan mentions:“For example, the unidentified band at 6.45KeV in (b) is likely to be Iron; the band at 0.29KeV in (b) identified as Calcium by the computer is likely to be Carbon (0.277 KeV) from the Calcium Carbonate (CaCO3) known to be in the ore. Fig. 3 is a good example as to how the EDS X-Ray computer identification today still requires human intervention in the analysis of the results. This is an important fact that will be mentioned in the next section.”
Ivan only mentions half truth here. Important thing for EDS analysis is that one must understand how it gets labeled. If a match is found with characteristic emission, the Computer labels it on the screen itself. This is called auto-peak-detection [[#Appendix A – Important terms and procedures]. If and only if or when a non-perfect match is obtained, or a peak cannot be marked due to low peak to background ratio (Refer #Appendix A – Important terms and procedures), the Computer do not label and the spikes are represented with blanks, and the analyst marks these manually if required.
For example, the spike in the sample graph above which Ivan shows, and for which he noticed a spike at 6.45 KeV (visually approximated) and comments it to be Iron, he did so because Iron has a strong Kα2 characteristics radiation at 6.403KeV.
Then Ivan produces a spectrograph where to the very left, two peaks marked as Calcium (Ca, Ca) appears and which Ivan says would be Carbon.
Let's see why EDS analysis may give erroneous results (e.g. as above). We are not considering the cases where a peak is left unmarked, as it was not the case here. We are only considering false identification of peaks or false positives (inaccurate analysis). The main categories are listed:# Human induced instrument error like wrong calibration, improper positioning, repeatability of focus, contamination, choosing lower P/B sensitivity, etc.
- Error in correcting excessive deadtime and resulting peak shift.
- Error due to relative intensity, i.e. low peak to background, resulting in a small spike from Bremsstrahlung being falsely identified as peak. Or setting a low threshold of peak to background, thus making the computer misidentify small bumps from continuum as peaks.
- Analysis issues like sum peaks and most relevant being peak overlap.
- Instrument limitation and susceptibility to misidentify certain closely spaced elements.
Refer #Appendix A – Important terms and procedures for definition of deadtime, sum peaks, escape peak, peak overlap.
Let's assume Ivan used an instrument that can effectively detect Carbon.
Calcium has two inseparable peaks at 341.3 eV of Lα1 and Lα2 emission lines that always shows as one and one more peak of L1 emission line at 344.9 eV [8]. In other words, there are 3 Calcium peaks in this region, but at best, shows as 2. Carbon, on the other hand, has a Kα1,2 peak at 277 eV [9]. Ivan was probably examining Dolomite, Ankerite or similar carbonate minerals of Calcium here. In such minerals, Calcium often has greater ratio by weight compared to Carbon. A closely spaced Calcium and Carbon peaks would sometime suppress the Carbon. In Ivan's example, one of the two distinguishable Calcium peaks are correctly shown, while the second peak masked the Carbon peak, thereby “omitting” it from the auto-peak-detection #Appendix A – Important terms and procedures. So in this case, the omission of Carbon is probably due to peak overlap.
Let's look at a classic case of peak overlap in the same spectrograph. Look for Kβ1 peak of Calcium at 4012 eV and find Calcium (Ca). Then look to the tallest peak which is also marked as Ca. There should be actually two markers of Calcium there for 3688eV for the Kα2 line and 3691 for the Kα1 line, but because Kα1 has greater intensity than Kα2 and closely spaced, the Kα2 line is overlapped by the Kα1 line of Carbon, in the same manner Carbon's line at 277ev is overlapped by one peak of Calcium.
Note here that for peak overlap, the there need to be two peaks of different elements of for same element, where the taller peak masks the less intense hence shorter peaks.
Also note that Ivan “knew” that the ore he was testing contained Calcium Carbonate. He could understand that a Carbon peak at the 277eV should be present. Vogel did not “knew” the composition of the sample at hand. This theme will be expanded later in the critic. We will also analyse the possibility of peak overlaps for Thulium. We will also examine if a visual examination would have been helpful for Vogel. But for now we'll look at this case.
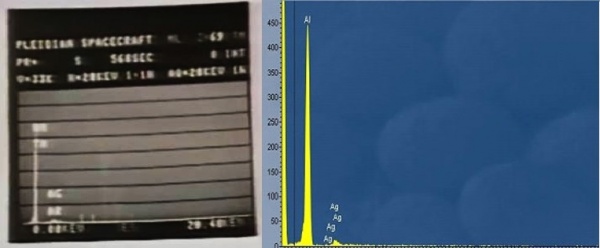
2. Material contains the rare-earth element Thulium. The EDS X-Ray spectrum shown by Vogel is Aluminium and not Thulium. This is concluded after Vogel's admission that the Thulium secondary bands were missing. Aluminium with traces of Silver is the best explanation for the spectrum shown.
Ivan mentions:
“In particular, the band at 7.179 KeV is almost as strong as the 1.462 KeV band and must have necessarily appeared in Vogel's EDS scan if the element was indeed Thulium.”
Ivan failed to mention that Vogel did not find secondary bands of “any elements” in this analysis as mentioned in the preliminary report and we can also see from the spectrograph. and that included Thulium. This is very important.
Refer Appendix B and compare with the spectrum obtained by Vogel, and you will find that similar to Thulium's secondary band, Bromine's secondary band which is almost as strong as the primary band, at 11.924 KeV is also missing that should have been detected also, but is absent from the spectral analysis. Similarly, Silver and Argon both showed up only once.
Next, lets see why Ivan allege that Vogel mistook Aluminium for Thulium. For that, #Appendix B – Characteristics X-Ray of elements in discussion again have to be referred. Looking at Appendix B, one can see that Aluminium have the strongest characteristics band of 1.4867 KeV, which is not visually discernible from 1.4863 KeV secondary band, which is why Aluminium visually appears to be missing secondary band. And Aluminium's primary band at 1.486 KeV is close to Thulium's 1.462 KeV. Here, Aluminium and Thulium have a small characteristics spectral peak separation of 24 eV and that's why Evan insists that Vogel misidentified Aluminium as Thulium.
Can Thulium be wrongly identified?
For an expert like Vogel, first cause (human error) is significantly reduced, though not eliminated. For an unknown sample, an argument that an expert has done mistake in calibration or tested the sample in a wrong manner, cannot be proved, so we have to take it at face value.
He would also have known how to correct for excessive deadtime which may result in peak shift.
The third issue (low peak to background) also can be ruled out since Thulium is shown as the major element and it is unlikely that this sample region with very sharp and tall peaks and near zero background can succumb to this error.
Peak overlap due to one high intensity peak suppressing the low intensity peak, is also not applicable as we can see (Thulium is the major element and most intense peak).
In EDS analysis, it is the instrument assists in matching of the element by performing an algorithmic match of the characteristic emission with its database values. As mentioned before, this is called auto peak detection or identification #Appendix A – Important terms and procedures. There still remains a possibility that the instrument may identify one element in preference to another through its auto-peak detection algorithm [10]. It is due to a combination of the shortcomings of the detector and the algorithm used for auto-peak-detection. In EDS analysis, the spectral resolution is poor and due to this finer study not possible. Another technique called the Wavelength Dispersive X-Ray Spectroscopy, or WDS analysis [11] is used which was not further applied by Vogel. Due to low spectral resolution of EDS, the computer have to make certain assumption and out of many possibility to fit one element or an other element or a combination of elements to a peak, especially if the peak is of the wide type. Different software sometimes would produce different results. But how bad this is? In this case, the Thulium peak detected was tall and sharp and the possibility of computer error is still further reduced, hough still not fully eliminated. What if still the computer erred? It is estimated that for major elements, the EDS auto-peak-identification fails for about 3% of cases[12]. In other words, this is accurate for 97% of the cases. Even though inaccurate result of 3% is considered very acceptable in practical life, it is considered pretty poor in scientific measurement.
But in layman term, a well calibrated EDS operated by a trained expert can be used to predict major constituent elements correctly much more often than not.
Vogel used the auto-peak-identification as evident from his comment during his interview “...Yes, we got this band here, this is the only one that matched in the spectral analysis in the computer, but the secondary bands that are connected with it are not present”. He may have run repeat checks or additional verification, but is not known.
So when visual analysis is done? And should visual analysis be done by Vogel?
Visual analysis is done for two cases. First, in cases if the algorithm is not fairly sure, the peak would be left unmarked, only for a manual identification to take place by an analyst, which does not happen in this case. Second, in case of characteristics emission of different elements in close spectral vicinity, all the secondary and minor peaks are used to obtain a curve. Then this curve is fitted in the spectrograph to eliminate or justify the possibility of the element auto detected, or to counter and justify another element. Secondary peaks were not present in the spectrograph obtained by Vogel as we can see from the graph and he could never have applied this technique.
Ivan's deconstruction of Vogel's mistaken element is a matter of opinion only and not an absolution as he presents. First, The computer marks Thulium and not Vogel (Ivan is betting on instrument error). Second, Vogel had little option to do a visual analysis. To assume one element instead of other because the latter is rare is scientifically wrong, especially for unknown sample composition. Finally, an expert of Vogel's calibre, assisted by Wie, would not do a careless job and do his best in eliminating other possibilities as much as permitted through the resources available to him. He would have carefully calibrated the instrument and may have run the test multiple times. His job was made difficult by the absence of secondary peaks, and he could not do a full curve fit along with the secondary peaks.
Even for an expert like Vogel, possibility remains for instrument error, which are fairly common in EDS. It is fair to argue that a Wavelength Dispersive X-Ray Spectroscopy, or WDS analysis would have made the case for Thulium stronger, but:
- EDS is better suited for qualitative analysis [13], i.e. identifying specimens where the constituent elements are unknown,
- Vogel might not have had an instrument in his possession,
- The sample disappeared as soon as he intended them to be shown to Haines. He had little time to subject them to finer analysis.
In conclusion, Ivan's allegation that Thulium was not found has little factual support, but banks heavily on instrument error. The way Ivan presents his debunking, as if he has found a mistake by Vogel is totally misleading. At best his allegation is a reminder that SEM EDS method error does happen.
“The very small band immediately adjacent to the predominant band in Vogel spectrum may very well be traces of silver in the region scanned; it would be unlikely that it is argon or, as Vogel says, a combination of silver and argon. Since many elements have bands that overlap with those of other elements, it is absolutely necessary to manually check other possibilities before conclusions are made about composition in an EDS spectrum. It is quite possible that Vogel was deceived by the computer's output; indeed, as noted in the previous section, even today's far more capable computers misinterpret EDS data requiring human intervention for evaluation. ”
What basically Ivan says here that when the computer matches silver as silver, that could very well be the case, but when the computer matches Argon as Argon, Vogel should have manually double-checked for other possibilities.
First, Ivan assumes Vogel and Wie were careless enough to state the presence of Argon and Thulium without trying their best within available resources to eliminate other possibilities. They might have taken multiple readings not stated in the video. Their job was complicated by absence of secondary bands.
Next, the computer performs an algorithmic match of the characteristic emission and intensity with its database, then applies an algorithm to determine the likely element, whereas the graph that is displayed on screen might have lower resolution. Thus, the eye can be more often betrayed and not the computer. Visual analysis always comes with a human judgement factor that can be biased. As explained before, in EDS analysis, human judgment from visual examination of graph comes in when an element is detected when there are other possibilities of peaks at close spectral range (like this case), then, the secondary bands are also considered which in this case was absent for the elements. When the secondary peaks are not present/probable, human judgment on what elements may be present is of little use. E.g. Thulium is not present and Aluminium is present just because Thulium is rare or improbable is no logic at all. Same for Argon. This speculation by Ivan too, banks on probable instrument error.
3. Material did not require gold coating for SEM imaging. Gold coating in SEM is used exclusively when the sample is non-conducting.
“Vogel considers extraordinary that the sample did not require metal coating for SEM imaging. ”
Vogel remarked that the sample did not require gold coating, but this alone, in no way make the sample remarkable, neither the investigators infer good conductivity as a pointer to extraterrestrial origin of the metal samples.
This particular comment is taken from the section wherein he investigates one crystal part of the sample using a technique called Field Emission micrography. Refer #Appendix A for details.
He mentions “And this is now a scanning electron micro-graph of A1 area and this is A2. His is 500 diameters and this is now this area here (pointing to an area within A1) blown up to 2000 diameters. This is Field Emission Microscope so one gets then a very very high degree of depth of field. The specimen was not touched, which means I did no gold-plating, no metalization of the sample, so it was left alone and what exited me was a tremendous ability to get a depth of field in the specimen without ion burning, in other words, the electron beam did not accumulated, this surfaces acted as conductors and gave us a very sharp delineation of the picture. Normally you have to take and cover this with gold in order to get a sharp picture.” [14]
Vogel was exited because in general crystals (except metallic crystals, or simply metals) are bad conductors of electricity [15]. Metals have free electrons that can bounce from one to another hence the 'flow' of electrons [16]. But things like table salt (examples of ionic crystals), are so tightly bound together, that the electrons don't leave their spot easily. Similarly, other types, like diamond (example of covalent crystals) are also non-conducting. Molecular crystals like water, again are also non-conducting. That is why Wendelle in his preliminary report (pp425) comments “A photomicrograph picture shot of this reveals unusual clarity indicating unusual conductivity of the electrons illuminating the image” and thereafter comments “We have exceedingly pure metal in one part of the specimen and non-metallic highly conductive crystals in other”. His comment is to be interpreted as – the whole sample in its discreet form, whether metallic or crystal, was highly conductive and especially the excellent conducting property of the non-metallic crystal part was unusual.
4. Portions identified as metal exhibit crystal birefringence. The optical microscopy methods used by Vogel are not suitable to conclusively demonstrate that some portions of the sample exhibit optical birefringence.
Refer #Appendix A – Important terms and procedures for definition of birefringence. Also note that Vogel was an expert on crystals and would have been very competent in inspecting crystals through microscope. He would have dealt with both isotropic and anisotropic crystals. When the properties of a material are the same in all directions, the material is said to be isotropic. Alternately, when the properties of a material vary with different crystallographic orientations, the material is said to be anisotropic. Birefringence is a result of optical anisotropy.
Ivan here challenges Vogel's method of identifying optical birefringence. Vogel examines the sample under optical microscope with the sample exposed to polarized light. From Wikipedia we read (copying directly from Wikipedia) [17]:“Polarized light microscopy can mean any of a number of optical microscopy techniques involving polarized light. Simple techniques include illumination of the sample with polarized light. Directly transmitted light can, optionally, be blocked with a polariser orientated at 90 degrees to the illumination. More complex microscopy techniques which take advantage of polarized light include differential interference contrast microscopy and interference reflection microscopy.
These illumination techniques are most commonly used on birefringent samples where the polarized light interacts strongly with the sample and so generating contrast with the background. Polarized light microscopy is used extensively in optical mineralogy. Polarized light microscopy is capable of providing information on absorption colour and optical path boundaries between minerals of differing refractive indices, in a manner similar to brightfield illumination, but the technique can also distinguish between isotropic and anisotropic substances. Furthermore, the contrast-enhancing technique exploits the optical properties specific to anisotropy and reveals detailed information concerning the structure and composition of materials that are invaluable for identification and diagnostic purposes.”Now what is differential interference contrast microscopy? It is also known as Nomarski Interference Contrast (NIC) or Nomarski microscopy. Again refer to the Wikipedia article on same topic and I copy from the same wikipedia article describing the light path in such a setup and point number 2:
“2. The polarised light enters the first Nomarski-modified Wollaston prism and is separated into two rays polarised at 90° to each other, the sampling and reference rays.
Main article: Wollaston prism
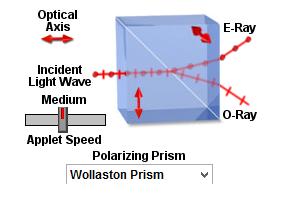
Wollaston prisms are a type of prism made of two layers of a crystalline substance, such as quartz, which, due to the variation of refractive index depending on the polarisation of the light, splits the light according to its polarisation. The Nomarski prism causes the two rays to come to a focal point outside the body of the prism, and so allows greater flexibility when setting up the microscope, as the prism can be actively focused. “
A Wollaston prsm is used in a Nomarski interference contrast (NIC) setup[18].
Cross polarised light is a term used to describe the state of a polarising microscope when both the lower and upper polariser are inserted. Polarised light is light that vibrates only in one direction. The lower polariser causes the incident light on a section to vibrate usually in the E-W direction. The upper polariser only allows light vibrating in the N-S direction to pass. With no mineral specimen in the path of the light, no light will pass through the upper polariser, also known as the analyser. Optically anisotropic minerals in the path of the incident rays, however, split light into two rays that when recombined at the analyser can interfere and pass through. Thus optically anisotropic materials appear bright or relatively bright in the background of optically isotropic material. In other words, cross polarization is a technique for inspecting optically anisotropic materials (or birefringent material).
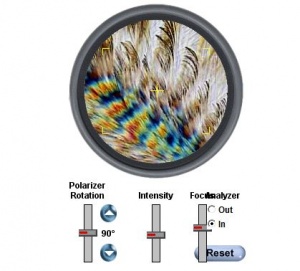
A tutorial found [here] explain the effect of rotation on a birefringent material (need to install Java to view):
In the tutorial you will learn first hand how the intensity of polarized light, angle of incidence and focus are used simultaneously to observe behaviour of birefringent material under polarised light.
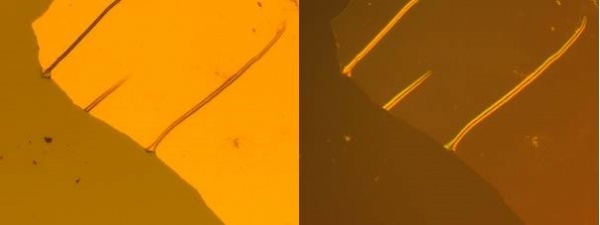
Ivan shows an example side by side comparison between “Same region of Vogel sample viewed under the microscope (a) ordinary illumination (b) combination of polarized light and Nomarski.” and comments “When a microscope is used in this way, a sample will show all sorts of details and visual effects, as shown in Fig. 8. It is not difficult to make features in a sample stand out if the proper adjustments are made.”
Read above. Polarized light and Nomarski technique are used in polarized micro-examination for birefringence materials. Ivan then simply shows a picture comparison of a sample that “was made by rubbing a pellet of aluminium onto the surface of a silicon wafer”. Ivan completely looses the context. He compares a material scratched with aluminium with obvious scratch marks to that of a birefringent material which needs inspection under polarised light. What he means basically is that Vogel might not have differentiated between a scratched non-birefringent material vs real birefringent material. The fact is, any crude manipulation would also have been evident under optical microscope if not naked eye. No such scratch marks were obvious through video.
“In Part 2 at the 3:21 time mark, Vogel interprets the bright region as evidence of metal birefringence. This is shown in Fig 9. To obtain these images, he either rotates one of the illumination polarizers or adjusts the Wollaston prism in an optical microscope equipped with Nomarski analysis setup.
Such rotation of polarizers and adjustment of Wollaston prism are integral to inspecting a birefringent sample. The effect of rotation of polariser is explained in above tutorial. Wollaston prism separates polarised light into two polarized outputs separated by an angle[19]. Wollaston prisms are commonly used in rotation mounts. A demonstration of use of Wollaston prism is available [[1]] (requires Java).
The same link can be referred to verify how such a setup is used to illuminate a birefringent sample for examination.
At this mark, Vogel examines the silvery specimen at 4th stage, and he rotates the analyzer (not the polarizer as Ivan asserts) while examining the specimen on the stage with fixed magnification. When the transmission axes of the analyzer and polarizer are crossed at an angle (90 degrees), maximum specimen birefringence is observed (maximum extinction of non-birefringent part). This is because no light from the non-birefringent part of the sample is accepted by the analyzer at this stage, however the region possessing birefringence couple some of the polarized light in one direction into other, therefore will not loose its brightness fully, but rather “appear” bright against the dark background.
Vogel also discovers birefringence at a higher magnification using SEM. Refer same video 6:35 mark.
Ivan does not elaborate how above-mentioned effect would cause it. However, Fresnel effect is the observation that things get more reflective at grazing angles. An example would be that if you look straight down from above at a pool of water, you will not see very much reflected light on the surface of the pool, and can see down through the surface to the bottom of the pool. At a glancing angle (looking with your eye level with the water, from the edge of the water surface), you will see much more secularity and reflections on the water surface, and might not be able to see what's under the water.
A simple yet beautiful demonstration is available in youtube[20].
Note here that the viewing angle changes and no polarized light is required to test this.
In a Nomarski DIC set up examining a non-birefringent set up will enhance the contrast at the region interface (edges). Ivan then gives an example in Figure 10 of his deconstruction update and asserts that the effect is similar, when it is not. Figure 10 from Ivan's deconstruction update is reproduced below.
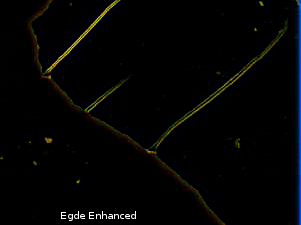
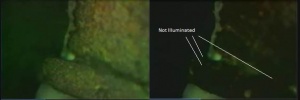
In Figure 10 of Ivan's deconstruction, the diagonal strips (edges) appear bright from previous dark while the previously comparatively brighter areas occupying majority of the sample's bottom left and top right portion looses brightness. This behaviour is quite natural with Nomarski DIC and does not indicate birefringence. A Nomarski DIC setup will ensure that the split light beams at the edges will either interfere destructively producing dark spots/lines, or constructively, producing bright spot/lines [21]. The effect shown in the example is localized along the edges as shown above, i.e. not identical to behavior of birefringent sample i.e. birefringent area retains full or part brightness while non-birefringent area looses illumination completely.
An edge detector algorithm on Ivan's left side image from Figure 9 (Figure 10 in Ivan's update) identifies the edges (see below). Note carefully how the edges of the circular protrusions and the cramps at the edges are illuminates, leaving the inside dark, i.e. the lines are actually 2 parallel lines and the circles are hollow circles. Then compare with the right side image from figure 10 of Ivan's deconstruction and check that these same edges are illuminated highlighting the parallel lines and hollow circles.
Then compare with Vogel's image which is much more complex and not related to edge illumination. The depositions showing birefringence here is much more thick and not just the edges.
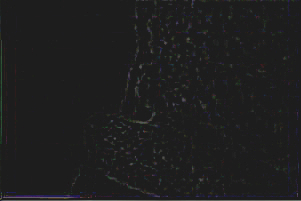
The same edge detection algorithm was ran on Vogel's sample and is reproduced below (notice the edges)
Now compare the above 2 figures, and note how it's not just edges that are illuminated.
Ivan also omitted Dr. Vogel's analysis of other even more complex segments. He points out birefringence in all the sample he tested (gradually diffused from lower to higher stage material), and a couple are shown below:
Looking at the first specimen from 4th stage, in tape 2 right in the beginning, Vogel points out birefringence. This specimen was polished: “It is silvery as you can see in colour. It looks like it has been melted. This is the last specimen which was <muffled> in plastic, <muffled> and polished in Switzerland and now you can see this meal in its pristine state”.
Then in another instance, looking at the fifth specimen belonging to silvery 4th stage metal, Dr. Vogel comments “We are now looking at a silvery metal fifth specimen number 5 at the 4th stage of development, that is used according to the document that was given to me in the preparation of the spacecraft. We are looking at the object now which is being <muffled> and polished, under cross field polarized light using a 250W Cesium Iodide light source”.
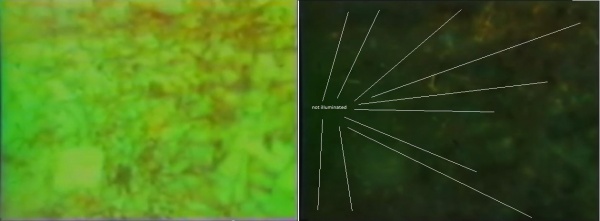
Vogel then points out pockets of white birefringent sub-area in otherwise non-birefringent dark area (see below). Also note the difference between this area, and the effect duplicated by Ivan by scratching one metal with another. This sample is remarked as being polished.
Vogel also describes birefringence characteristics of the 5th stage sample number 6 in part 4 of the video staring 6:00 minute mark, but the video is too dark to be analysed/verified.
“In this case, the effect is entirely due to the particular topography of the surface and, though the effect is similar to that shown in Fig 9, it does not constitute evidence of metal birefringence or any other exotic or unknown property.”
Ivan suggests hypothetically that the “effect” of birefringent material can be duplicated by non-birefringent samples, which is wrong [22] [23]. To the eye they may appear similar (though not same), a trained expert will never make a mistake. By suggesting that Vogel and Wie could have mistaken between a metal scratched with Aluminium or an improper deposition of a thin film of discrete metal with an uneven topography is not supportable since even at lower magnification if not through naked eye such manipulations are visible, moreover, such report is not made by Walker or EMPA. The other possibility which Ivan might have hinted here is gross incompetency if not outright dishonesty especially from Walker, Vogel and his associate. Ivan goes into this theme much more vigorously in the third attempt.
5. Portions of sample examined at a magnification of 500 diameters show evidence of micro-manipulation. It was found that indentations similar to those found by Vogel can be produced by conventional metal machining. The indentations have a pitch small enough to be captured with a scanning electron microscope at a 500 diameter magnification.
Ivan compares 2 images: Ivan forgets that the micro-manipulation was detected not throughout the 4-5 mm wide sample, but in a particular area. Vogel says “And now we are going into his area, this plain, right in this region and we found evidence of what looked like mechanical manipulation.”
Vogel at this stage is looking at a region perhaps no wider than perhaps 1mm by 1mm (or less) and the photograph is probably representing only a section of this area. Vogel could not find this everywhere within the sample. This area is the plain area as we see in the video, to the upper right region of the middle, with no exposed edges. This small region within a small sample was manipulated in a diagonal pattern criss-crossed by parallel pattern (what Vogel describes as “ploughed”).
Ivan reproduction is probably a result of improper or rough polishing or metal cutting performed in a machine shop. Ivan in his 2012 deconstruction published in openminds.tv, later claimed that his sample had this feature in one particular area only. Semi-imprecise polishing of a sample, may produce such patterns, consistent with the grit of the abrasive. Metal cutting may produce this pattern, wherein due to imperfection of the cutting tool, different regions will have different abrasions and the sample will develop patterns which may vary. Ivan does not elaborate the size of his sample, what was used for cutting, if other regions had completely smooth areas or showed other patterns, did this pattern appeared on an area approximately of 1mm by 1mm or in similar scale, was polishing employed wholly or selectively, etc. Until he reveals these questions, the means and motives of Mr. Meier to do the same cannot be ascertained.
The patterns in the sample tested proved that some sort of mechanical manipulation was carried out on a very selected area of the sample. Convention metal machining produce patterns are developed over relatively larger area from which a small chunk can be cut out. But how it can be tightly integrated or fused discretely, in the complex manner as it is shown, to other metallic and non-metallic crystalline material? Why other parts of the sample did not show this pattern? Was a precision method used for machining? Few companies provided laser working tool service for industries and defence companies in the 70's, but such a manipulation by Meier would leave out witnesses in the open. Or some other techniques? If the technique followed by Ivan was used, did Meier had the equipments and the means to perform the same, and how did he applied the polishing or cutting technique in a very small area?
6. Statements made to the effect of how these metal samples are unusual, extraordinary, difficult to fabricate, etc. All of these are Vogel's own opinions and they are not supported by the evidence he presents. It is also not clear why the claims, even if true, would make the metal samples remarkable or worth studying.
“In a nutshell, the notable claims of this sample are that it contains a wide range of elements, the hard-to-obtain element Thulium, and metal crystals exhibiting birefringence. All of these claims are in themselves not remarkable or notable. Thulium, though rare, was available in the 80s and there is no reason that a metal in crystal form would not exhibit some degree of birefringence. A sample can be made to contain many elements of the periodic table without using "cold fusion", as Vogel suggests. Thus, even in the case that all of the claims about Meier's samples are correct, it still is not clear why these would make them remarkable. However, it would be interesting if the elements shown were all chemically bonded, but Vogel presents no evidence and performs no test that would lead to establish chemical bonding or alloying between them.”
With all of Ivan's claim refuted or disputed, it is apparent that Ivan's claim have no support.The unusualness of the sample is commented by Vogel is not alloying (which is done by melting), but the presence of these elements in discrete regions and with distinct boundaries between the regions (no evidence of melting in a furnace). Sample can be made to have many elements, but it is the combination and how they were put together that intrigued Vogel and Walker. Vogel sums up neatly at the end of part 4 - “Right now I could not explain the type of material that I have in its discreteness, by any known combination of materials. I could not put it together myself, as a scientist. To get a combination of Thulium, Silver and Silicon, in discrete areas – yes, if I were to melt it together, I would see the evidence of all of it, but its discreteness is what intrigues me.”
Below is a table illustrate the unusualness of the samples, but few may be missed. Most of the findings by Vogel are on video except EDS spectra of Rhenium and his tests on determination of the unusual grain pattern (additional clear images or video is absent). Also any x-ray diffraction analysis is omitted from the interview video.
| Property | Detected By | Earth Occurrence |
|---|---|---|
| Presence of chlorine in alloy was unusual as chlorine turns to gas at much lower temperature than other metal's melting point that were detected
(EMPA report and preliminary report pp 420 and 423) |
EMPA | Unknown |
| Non-metallic material existing discretely in “free state” and tightly bound in the metal mass (preliminary report pp 415) | Walker, further corroborated by Vogel | Unknown |
| Uniform and Sub angular shaped non-metallic indicated a joining process not involving heat and abrasion in the liquid metal (preliminary report pp 415). No ash or heat residue detected by Vogel | Walker further corroborated by Vogel | Unknown |
| Unexpected outflow of gas given out by metal sample when slicing thin when mounting in lucite crystal for microscopic examination (preliminary report pp 415) | Walker | Unknown |
| Very rapid oxidation at low humidity, possibility of oxidizing agent in the sample, no remnant of oxidised residue
(preliminary report pp 419) |
Walker | Unknown |
| Evidence of Micro-manipulation detected in an area of a sample | Vogel | Difficult |
| No secondary bands of characteristic emission for all the element in the mix | Vogel | Unknown |
| Extremely high conductivity of the non-metallic crystal part of sample | Vogel. Walker also found the sample overall very conductive. | Unknown. |
| Birefringent metal part | Vogel | Unknown. |
| Purity of elements evident by sharp spectral peaks, and that included Thulium.** | Vogel | Difficult |
| All elements registered only primary band | Vogel | Unknown |
| Presence of Rhenium in sample | Vogel | Difficult |
| Strange grain patterns (horizontal, sandwiched between vertical grains) | Vogel | Unknown |
**Thulium does not occur naturally in pure form, and was prohibitively costly in the 70's. Recent discoveries have reduced the rarity of Thulium to about that of gold or Silver [24], but in pure form remain hard to procure and relatively costly.
Ivan gives his own list of properties he would like to see, instead he should explain the properties listed above. Perhaps Ivan himself knows that these properties are unique and that's why in his third attempt, he goes on attacking mode, describing how the “effect” can be “duplicated” in crude manner, and thereby accusing the above scientists of being co-conspirators with Meier.
The author feels due attention should be given to review the Vogel tape by highly qualified and unbiased metallurgists and chemists. A review with the intention of debunking will produce silly arguments.
Part 3 – Third Attempt
Ivan mentions:
“1. Samples contain almost all of the elements of the periodic table.
The claims above have direct data associated to them. Notice that many of the claims that Vogel made are secondary and derive from conclusions he reached from the propositions listed above.”
Most of what Ivan alleges are repeats from previous attempts, but there are a few novel of them, requiring additional explanation. In the third attempt, Ivan's deconstruction is even more based on “duplicating” the effect, then the First and Second effort, and thus Ivan strongly suggests Vogel's complicity in manipulating the results since the effect can be "duplicated". In Ivan's own word “The intention of this article is to show that Vogel’s main claims can be scientifically verified based on his own data and that his results can be reproduced out of ordinary materials.”
Ivan compares Vogel's detected spectrum from the crystal part:
and comments
“Given the similarities of the two spectra above, it can be deduced that the evidence for all the elements present in the sample can be reproduced by a sample consisting of virtually a single element which, in this case, was a pellet of ultra-pure nickel.”
The characteristic spectrum is called “characteristic”, because the spectral peaks of each elements are “unique”. So no two spectral analysis are same unless the samples are composed of same constituent elements and same ratio/weight, as evident even from the visual comparison of the two. What Ivan shows here is the Bremsstrahlung continuum. Similar spectrograph as what Ivan produced can also result out of a pile-up issue with other elements. Refer part 2 on detail critic on Ivan's debunking of this spectrograph that Vogel obtained from the crystalline part of the sample.
“Fig. 3 shows a screen-shot of Vogel’s EDS spectrum where he identifies Thulium and other elements. Here, it is pointed out that the secondary bands of Thulium are not present, which is further used to speculate that the material was put together by unknown methods (e.g. cold fusion).”
Absence of secondary band was one of the preliminary symptom, and it led to speculation that it was put together in an “unknown process” (cold fusion is not speculated at this stage). Non-electric cold fusion method was suspected because there was no ash and no heat residue. Another driver to this theory was presence of chlorine, whose boiling point was much less than the other constituent metals/elements (also other trace metals like Bromine and Argon).
Later, the deduction that it is made from cold fusion or similar process is supported by a remark made by Vogel while examining first sample (video is dark), belonging to the 3rd stage material, “Now we can see banded structures in the centre of the field like flow lines as one would encounter in lava like flows. The material looks like it has been extended in a flow process, but it does not show what one would see in a furnace from extensive heating. The remark has been made that this specimen has been made by a cold flow process”.
Although the video is dark during this comment, another example of what Vogel sees here also can be seen in the 9:14 mark of the video when Vogel comments “There is a complete pattern of material flowing in and precisely stopping. Here one can see a better detailing of this. It's like the material has been kneaded and rolled over and flowed together.”
On the distinct areas, Vogel remarks on the video many times, couple of which are shown below:
“The spectrum shown in Fig. 4 below was produced with a sample made by manually placing a small flake of Silver on top of Aluminium.”“The striking similarity between the two spectra in Figs. 3 and 4 is evident and, thus, what Vogel observed was not the hard-to-obtain Thulium, but rather the very-common element Aluminium with some traces of Silver [4].”
Again, the manipulation done by Ivan is not-to-miss crude kind. If Vogel knowingly ignored such crude manipulations, and Ivan's theory is to be hold truee, then Vogel and Wie were complicit in falsification and nothing less. But even such a scenario have problems – the peaks appear visually similar, but they are not same – as written above, they are “unique” spectral characteristics. In Dr. Vogel's analysis, it is the computer that marks Thulium, not Vogel. In Part 2 it is explained how Ivan's allegation only highlights a probability (that the instrument may err) and not matter of fact. Secondly, how on earth Vogel suppressed the secondary bands of all the elements?
Note here one particular interesting aspect of the spectrograph produced by the plain area of the sample that constituted Thulium as its primary element. In Vogel's analysis, only 1 peak each from Thulium, Bromine, Argon and Silver are present.
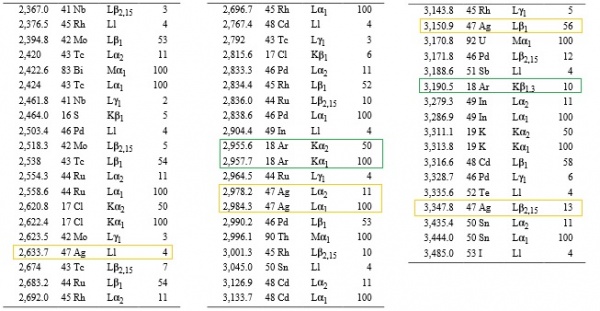
Now look at Ivan's spectrograph. The peaks are sharp and clear like Vogel's with low background, probably because Ivan did use a pure sample, like Vogel had in his hand. The Aluminium peaks at 1486.3 eV and 1486.7eV are overlapped, so they show as one, but 4 out of 5 major and minor Silvers peak ranging from 2633.7eV-3347.4eV were detected by Ivan's EDS analysis. Now note that Argon also has as many 3 peaks at this range, not to mention a host of other elements. The peak mix at this range is reproduced below. Ivan's EDS analysis auto-peak-detection did not confuse between Silver and Argon peaks even though they are in close spectral proximity. Neither it got confused between Silver and Tellurium (Te), or between Silver and Molybdenum (Mo) or between Silver and Ruthenium (Ru) Silver and Thorium (Th). Goes to show that EDS is not as unreliable tool to do spectral analysis as Ivan makes it.
There are instance EDS analysis cannot identify elements or gives false positives, but those are results of not only closeness of peaks, but such peak shifts and/or false positives occur due to specific reasons. Just because there is probability of another elemental peak in the spectral vicinity, it cannot be stated that peak A was actually peak B, that too when secondary emissions were absent, and neither because the detected element was rare. Absence of secondary peaks deprive the analyst to do a manual curve fit in order to cross check the element detected. WDS method is recorded for finer analysis for elemental composition, because in science even 3-5% inaccuracy is a lot. But at the same time, such arguments that Aluminium was detected instead of Thulium just because they “look similar” and the peaks are close enough is just the straw man argument we don't need. Even if they look similar, the characteristic lines are “unique” and the computer marked Thulium and not Aluminium because the characteristics spectrum energy and intensity matched Thulium and not Aluminium [25]. Unless instrument error is proven, which is nearly impossible for an unknown sample, by looking at the spectrograph, such comments are nothing but pure opinion.
“The Aluminium and Silver of the sample in Fig. 4 are obviously not bonded or alloyed and yet the sample still produces an EDS spectrum identical to Vogel’s.”
The novelty of the sample tested by Vogel was that it was not alloyed, not crudely placed on top, not melted, but that the non-metallic material part were existing discretely in “free state” and tightly bound in the metal mass. No evidence of melting were found. The experts speculated a cold fusion process. Reproduction by Ivan has no value.
“It is common for a computer analyzing EDS spectra to mistake between elements whose energy bands lie close to each other. This explains why the computer also identified Bromine and Argon in Vogel’s spectrum as they too possess energy bands close to Aluminium and Silver.”
It is common, but it does not mean such mistake occurred. Ivan has no way to verify if a false positive occurred, especially when secondary bands were absent. Here is what Ivan did – he unreasonably justified Bromine and Argon false positive on the basis of a probable Thulium false positive. Then, he tried to duplicate the visual chart that Vogel's instrument rendered by placing a small flake of Silver on top of Aluminium plate. As an engineer, Ivan should know the uselessness of a “visually similar” spectrograph.
First, false positive of Thulium is a probability, not a fact. Second, false positive of one element cannot be used to justify false positive of others. Then, he again commits a crude manipulation easily spotted by even non-experts, let alone scientists. Finally, the computer marked the elements, and no secondary bands were present for the elements.
“Vogel claims to have detected dielectric birefringence in inclusions around the edges of the sample by means of optical microscopy with cross-polarized illumination.”
“However, such observation can also be produced by samples that have rugged topography.”
Birefringence was not just detected around the edge, but in gross areas. An expert like Vogel should have known to spot the difference. Refer Part 2 of this article for refutation and compare with Ivan's “duplication”.
“Since the sample analysed by Vogel has a very clear rough surface, the bright regions he observes under cross-polarized light are best explained by the surface topography and not by the presence of non-metallic crystal inclusions in the sample.”
While examining the first specimen Vogel comments “It is silvery as you can see in colour. It looks like it has been melted. This is the last specimen which was mounted in plastic, lapped and polished in Switzerland and now you can see this meal in its pristine state”.
Again, while examining the 5th sample belonging to stage 4, Vogel comments “We are now looking at a silvery metal fifth specimen number 5 at the 4th stage of development, that is used according to the document that was given to me in the preparation of the spacecraft. We are looking at the object now, which is being lapped and polished, under cross field polarized light using a 250W Cesium Iodide light source”.
The polishing status of the other specimen is not known, but it would be safe to presume that someone of Vogel's credential would eliminate such problems before testing the sample and/or otherwise would know to differentiate between reflection from rough/scratched surface localized at the edges and real birefringence. The samples Vogel tested had uneven shape, and undulations were present. It is best practice to polish a sample before birefringence test. But even an unevenly shaped, undulated samples can be inspected for birefringence. What matters are that the false positives from sharp edges or extensions of the sample should not interfere, and even they do, they can be isolated. To eliminate such possibility of sharp edge/rough surface/scratching type birefringence in a not so well polished sample, the sample is first visually inspected, then microscopically inspected at different magnification to record its micro and macro level behaviour (Vogel did tests birefringence at various magnifications). Refer #Part 2 – Second Attempt for explanation how edge produced effects are similar to a non-expert, but also very different from what a real birefringent sample would produce.
Moreover, the birefringence observed by Vogel was not localised to edges as seen from video. The difference between the effect due to reflection from rough surface and birefringence is explained in detail in #Part 2 – Second Attempt.
“For example, Vogel claimed that Rhenium was found in the sample with missing EDS bands also; the spectrum was not shown in either references [1] or [2] and it could have been Zinc, as this element has some EDS bands close to that of Rhenium.”
Note how in the case of Thulium, Bromine, Argon and Silver only a single peak is present in Vogel's analysis. For Rhenium, the primary peaks are for its Lα1 emission line at 8.586 KeV, followed by Mα1 emission line at 1.842 KeV. There are actually several possibilities for Rhenium:
– Both the Lα1 and Mα1 peaks were detected and one or more of the secondary/minor peaks also detected. In this case, it would have been hard to refute Rhenium, but most probably this did not happen, following the pattern for other elements in the metallic region.
- Only Lα1 peak detected.
- Only Mα1 peak detected.
We never knew if Rhenium was a "major" element or “minor” element in the metal area. Had It been a major element, only Zinc with similar relative intensity at 8.639 KeV could have compared with Rhenium in nearby spectral range. For Mα1, this role could have been taken by highly reactive Strontium.
As postulated before, it is also possible that Vogel did not document 100% of his findings in Video. Also, Ivan mentions "if" Rhenium was though to be found, it could have been mistaken in place of "Zinc". Again, we see Ivan relying on nothing but instrument error to debunk presence of Rhenium, when in reality it is not possible to determine instrument error from the video.
Ivan time and again produced visually similar (not same) spectrum with crude manipulations and tried to associate the results of Vogel's analysis as instrument error or gross negligence or outright complicity. He used his go-to arguments to confuse the readers and debunk Thulium, Argon and Rhenium. He similarly used crude method to nearly simulate birefringence, as well as micro-manipulation. Then again, he completely ignored several other unusual properties exhibited by the sample. On the light of this, IIG and Ivan's debunking should not be taken seriously and further analysis should only be entertained from an unbiased metallurgist.
Appendix A – Important terms and procedures
Birefringence: Birefringence is formally defined as the double refraction of light in a transparent, molecularly ordered material, which is manifested by the existence of orientation-dependent differences in refractive index. Many transparent solids are optically isotropic, meaning that the index of refraction is equal in all directions throughout the crystalline lattice. Typical examples of isotropic solid are glass, table salt.
An example of anisotropic material are Calcite and quartz. The layman’s explanation of birefringent behaviour of Calcite is that when object is shown through Calcite, tend to show double or blurred images.
Polarized light or polarization of light: Natural sunlight and almost every other form of artificial illumination transmits light waves whose electric field vectors vibrate in all perpendicular planes with respect to the direction of propagation. When the electric field vectors are restricted to a single plane by filtration, then the light is said to be polarized with respect to the direction of propagation and all waves vibrate in the same plane.
X-ray diffraction (XDR): This method is used in X-ray crystallography. This tool used for identifying the atomic and molecular structure of a crystal, in which the crystalline atoms cause a beam of incident X-rays to diffract into many specific directions. By measuring the angles and intensities of these diffracted beams, a crystallographer can produce a three-dimensional picture of the density of electrons within the crystal. From this electron density, the mean positions of the atoms in the crystal can be determined, as well as their chemical bonds, their disorder and various other information.
Scanning electron microscope (SEM): A scanning electron microscope is a type of electron microscope that produces images of a sample by scanning it with a focused beam of electrons. For conventional imaging in the SEM, specimens must be electrically conductive, at least at the surface, and electrically grounded to prevent the accumulation of electrostatic charge at the surface. Metal objects require little special preparation for SEM except for cleaning and mounting on a specimen stub. Non conductive specimens tend to charge when scanned by the electron beam, and especially in secondary electron imaging mode, this causes scanning faults and other image artefacts. SEM can also act as an electron source for producing characteristics X-Rays for Energy Dispersive X-Ray analysis. A nice video can be found on youtube that demonstrates how SEM EDS analysts identify the elements[26].
Energy-dispersive X-ray (EDX): Energy-dispersive X-ray spectroscopy (EDS, EDX, or XEDS), sometimes also called energy dispersive X-ray analysis (EDXA) or energy dispersive X-ray microanalysis (EDXMA), is an analytical technique used for the elemental analysis or chemical characterization of a sample.
Auto-peak-detection: In EDS analysis the computer labels the peak automatically. Each element has its “unique” characteristics emission radiation when its K, L, M shell electrons gets displaced by an incident beam of electron and thereafter an electron from one shell “jumps” to fill the void thereby giving by x-ray radiation which are unique for the element. The energy of the emission is detected by a detector. The computer database stores the unique emission. If a match is found in database with the energy of the characteristics emission that detected by a detector, the Computer labels it on the screen itself. This is called auto-peak-detection. But in certain cases, the peak might be two weak against the background or the peak might be overlapped against a bigger peak of same or different element, then this auto-peak-detection is “omitted”. At other times, cases of false identification can also take place, due to various reasons. This is explained in #Part 1 – Second Attempt.
Bremsstrahlung: It is an important phenomenon in the generation of X-rays. In the Bremsstrahlung process, a high speed electron traveling in a material is slowed or completely stopped by the forces of any atom it encounters. As a high speed electron approaches an atom, it will interact with the negative force from the electrons of the atom, and it may be slowed or completely stopped. If the electron is slowed down, it will exit the material with less energy. The law of conservation of energy tells us that this energy cannot be lost and must be absorbed by the atom or converted to another form of energy. The energy used to slow the electron is excessive to the atom and the energy will be radiated as x-radiation of equal energy.
Analytical Problems with SEM-EDS:
Escape peaks – there is a statistical probability that some of the X-rays, generated in the sample and impacting the solid state detector (e.g., a SiLi device), will 'inadvertently' knock out Si K-shell electrons in the detector, reducing that X-ray's energy measured in the detector by the Si absorption edge energy (1.84 KeV). Say you're looking at something will lots of Fe (Ka of 6.40 KeV); the Si-escape peak of Fe Ka will appear at 4.56 KeV. You see this escape peak only for the major elements present.
Sum peaks – this phenomenon occurs where the count rates are moderate to high, when two X-rays impact the detector virtually instantaneously; the pulse created and measured is the sum of the two X-ray energies. Say you have a sample with lots of Si (Ka of 1.74 KeV) and Al (Ka of 1.487); a peak at 3.23 KeV is the sum peak, not to be assumed to be a K peak (Ka of 3.31 KeV)[27].
Peak overlaps – the spectral resolution of EDS is not a great as WDS. Resolution is usually defined as the FWHM (full width at half maximum) of pure Mn Ka: ~ 150 eV. Therefore, the separation of some peaks can be poor. Examples include the case where small amounts of Fe are being investigated in the presence of large amounts of Mn (Mn Kb is very close to Fe Ka), and the case where Cu, Zn and Na are present together: the L lines of Cu and Zn are close to the K lines of Na.
Excessive deadtime – because of the closeness of the EDS detector to the sample, and the possibility that the user may be using high beam currents, there may be 'pulse pileup' where the electronics cannot keep up with the X-rays impacting the detector. The electronics/software therefore has to try to adjust for the x-rays not counted, by calculating a 'deadtime correction'; the larger the correction, the greater the margin of error. Generally the deadtime should be kept below 20-30% by the operator (usually indicated on the monitor), either by lowering the beam current, inserting apertures in front of the detector nose-piece, or retracting the detector (if adjustable). Excessive deadtime can also cause a shift of the peak position.
Pot metal: Pot metal is a colloquial term that refers to alloys of low-melting point metals that manufacturers use to make fast, inexpensive castings. Pot metal frequently constitute zinc, lead, copper, tin, magnesium, aluminium, iron, and cadmium.
Sputter coating or metal coating: Sputter coating in scanning electron microscopy is a sputter deposition process to cover a specimen with a thin layer of conducting material, typically a metal, such as a gold. A conductive coating is needed to prevent charging of a specimen with an electron beam in conventional SEM mode (high vacuum, high voltage).
Field emission microscopy (FEM): It is an analytical technique used in materials science to investigate molecular surface structures and their electronic properties. Invented by Erwin Wilhelm Müller in 1936, the FEM was one of the first surface analysis instruments that approached “near-atomic” resolution.
Appendix B – Characteristic X-Ray of elements in discussion
Appendix B lists the characteristic x-ray relative intensity for important elements detected plus Aluminium (which Ivan allege that Vogel mistook for Thulium) and Zinc and Carbon (both which Ivan shows as an example in his debunking)
Relative intensities are provided. An intensity of 100 is assigned to the strongest line in each shell for each element.
Factors related to the sample, the system used to generate the X-rays and the detector used to measure the X-ray spectrum can all influence the height of the X-ray peaks. While the intensities of the peaks in an X-ray energy spectrum are not directly proportional to element concentration, it is true that the concentration of the element in the sample will influence the height of the X-ray peak. Elements present in major amounts (> 10 wt%) will have major peaks in the spectrum while elements present in minor (1-10 wt%) or trace amounts (<1 wt%) will have small or undetectable peaks in the spectrum[28].
| Band (in eV) | Line | Relative Intensity | Comment |
| Thulium (Tm) | |||
| 1462 | Mα1 | 100 | (strong) |
| 6341.9 | L1 | 4 | |
| 7133.1 | Lα2 | 11 | |
| 7179.9 | Lα1 | 100 | (strong) |
| 8101 | Lβ1 | 64 | (intense) |
| 8468 | Lβ2 | 20 | |
| 9426 | Lγ1 | 12 | |
| <higher spectrum omitted> | |||
| Aluminium (Al) | |||
| 1486.3 | Kα1 | 50 | (secondary band overlapped by stronger Kα2) |
| 1486.7 | Kα2 | 100 | (primary identifier) |
| Bromine (Br) | |||
| 1293.5 | L1 | 5 | |
| 1480.4 | Lα1,2 | 111 | (strong) |
| 1525.9 | Lβ1 | 59 | (intense) |
| 11877.6 | Kα2 | 52 | |
| 11924.2 | Kα1 | 100 | (strong) |
| 13284.5 | Kβ3 | 7 | |
| 13291.4 | Kβ1 | 14 | |
| 13469.5 | Kβ2 | 1 | |
| Argon (Ar) | |||
| 2955.6 | Kα2 | 50 | (intense, but overlapped by Kα1) |
| 2957.7 | Kα1 | 100 | (primary identifier) |
| 3190.5 | Kβ1,3 | 10 | |
| Silver (Ag) | |||
| 2633.7 | L1 | 4 | |
| 2978.2 | Lα2 | 11 | |
| 2984.3 | Lα1 | 100 | (srtong) |
| 3150.9 | Lβ1 | 56 | (intense) |
| 3347.8 | Lβ2,15 | 13 | |
| 3519.6 | Lγ1 | 6 | |
| 21990.3 | Kα2 | 56 | (intense) |
| 22162.9 | Kα1 | 100 | (strong) |
| 24911.5 | Kβ3 | 9 | |
| 24942.4 | Kβ1 | 16 | |
| 25456.4 | Kβ2 | 4 | |
| Sulpher (S) | |||
| 2306.6 | Kα2 | 50 | (intense) |
| 2307.8 | Kα1 | 100 | (strong, primary identifier) |
| 2464 | Kβ1 | 5 | |
| Rhenium (Re) | |||
| 1842.5 | Mα1 | 100 | (strong) |
| 7603.6 | L1 | 5 | |
| 8586.2 | Lα2 | 11 | |
| 8652.5 | Lα1 | 100 | (strong) |
| 10001 | Lβ1 | 66 | (intense) |
| 10275.2 | Lβ2 | 22 | |
| 11685.4 | Lγ1 | 13 | |
| <higher spectrum omitted> | |||
| Zinc (Zn) | |||
| 884 | L1 | 7 | |
| 1011.7 | Lα1,2 | 111 | (strong, primary identifier) |
| 1034.7 | Lβ1 | 65 | (intense) |
| 8615.8 | Kα2 | 51 | (intense) |
| 8638.9 | Kα1 | 100 | (strong) |
| 9572 | Kβ1,3 | 17 | |
| Carbon (C) | |||
| 277 | Kα1 | 147 | (primary identifier) |
Appendix C – Vogel Video parts summary
References
- ↑ http://www.billymeierufocase.com/metaldeconstruction.html
- ↑ http://www.billymeierufocase.com/metaldeconstructionupdate.html
- ↑ http://www.openminds.tv/deconstruction-billy-meiers-metal-samples/28955
- ↑ http://en.wikipedia.org/wiki/Energy-dispersive_X-ray_spectroscopy#Equipment
- ↑ http://www2.arnes.si/~sgszmera1/html/material_analysis.html
- ↑ http://www.cameco.com/uranium_101/uranium-overview/radiation/
- ↑ http://www.world-nuclear.org/info/Safety-and-Security/Radiation-and-Health/Occupational-Safety-in-Uranium-Mining/
- ↑ http://xdb.lbl.gov/Section1/Periodic_Table/Ca_Web_data.htm
- ↑ http://xdb.lbl.gov/Section1/Periodic_Table/C_Web_data.htm
- ↑ http://www.geology.wisc.edu/~johnf/g777/Scanning/Newbury_2009.pdf
- ↑ http://mcff.mtu.edu/acmal/electronmicroscopy/MA_EDS_WDS.htm
- ↑ http://epmalab.uoregon.edu/Workshop3/Peak_ID_Workshop08-Handout.pdf
- ↑ http://www.ammrf.org.au/myscope/analysis/eds/qualitative.php
- ↑ http://en.wikipedia.org/wiki/Field_emission_microscopy
- ↑ http://www2.ucdsb.on.ca/tiss/stretton/CHEM2/arch20.htm
- ↑ https://www.boundless.com/chemistry/textbooks/boundless-chemistry-textbook/liquids-and-solids-11/types-of-crystals-87/metallic-crystals-386-7955/
- ↑ http://en.wikipedia.org/wiki/Birefringence
- ↑ http://en.wikipedia.org/wiki/Wollaston_prism
- ↑ https://www.thorlabs.com/newgrouppage9.cfm?objectgroup_id=917
- ↑ https://www.youtube.com/watch?v=F-2cUWUe0fY
- ↑ https://www.youtube.com/watch?v=TKTGgAQ2VEs
- ↑ http://en.wikipedia.org/wiki/Polarized_light_microscopy
- ↑ http://en.wikipedia.org/wiki/Birefringence#Measurement
- ↑ http://www.molycorp.com/resources/the-rare-earth-elements/thulium/
- ↑ http://www.seallabs.com/how-sem-eds-works.html
- ↑ https://www.youtube.com/watch?v=GY9lfO-tVfE
- ↑ http://www.geology.wisc.edu/~johnf/660.html
- ↑ http://www.ammrf.org.au/myscope/analysis/eds/xrayintensity/
| * The author could not locate original article from IIG West website and hence referred to billymeierufocase.com. The author copied images and text from billymeierufocase.com for critique purpose. No copyright infringement meant. Due references have been provided. |
- Subhabrata Mukhuti

